 Are you tired of the same old frozen fries?
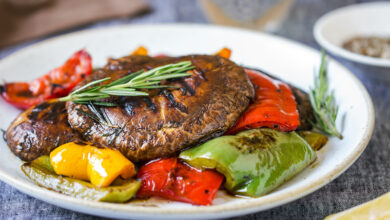
These sweet potato wedges will have your family saying, “When did dad learn to cook like this?” and guests asking, “Where did you buy these?” You will feel empowered knowing that you created such a wonderful and nutritious meal for your family.
This recipe will have you feeling like a 5-star chef in your own home, and you’ll be done in 15 minutes. You don’t have to cut them into wedges either, you can go rounds, large dice, or even fry shape. The addition of rosemary gives them a nice savoury flavour while you also enjoy the sweet flavour. You can also add a pinch of paprika to give them a bit more colour. To cut the sweet potato into wedges you cut the potato in half, then take each half and cut each half into two halves. So you will be left with eight equal sized wedges. You can also use mini sweet potatoes and just cut them into fours. I like using the minis, it is just easier.
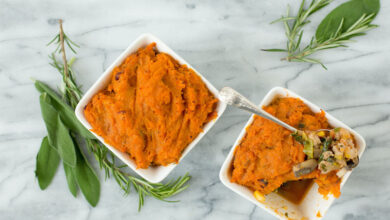
Sweet potatoes are, you guessed it, part of the potato family and is considered a root vegetable. Raw sweet potatoes are rich in complex carbohydrates, dietary fibre, and beta-carotene. Sweet Potatoes are so versatile that you can even use them in desserts.Roasted
Sweet Potatoe Wedges
Ingredients:
• 6-8 Sweet Potatoes, 30 ml Chopped Rosemary, 40 ml Olive Oil, Salt and Pepper
Directions:
1. Pre-heat oven to 450°F.
2. Cut sweet potatoes into wedges (or desired shape).
3. Place potatoes in a bowl with rosemary and salt and pepper.
4. Add olive oil and toss until wedges are coated with rosemary, olive oil, salt, and pepper.
5. Put on pan and place in oven for 20 minutes.
6. Serve, Eat Well, and Be Happy!!
Every household needs a go-to chicken recipe! When you bring this chicken to the table with herbed butter infused underneath the skin, your family will think that a chef created it, and you ordered it in from a restaurant.
The secret is herbed butter is put underneath the skin before you put your chicken in the oven. The butter under the skin gives amazing flavour leaving your chicken very moist. Also, by patting the outside of the chicken dry, and rubbing it with olive oil, you will produce a succulent and crispy skin.
Adding onion and lemon to the inside of the chicken also increases the moisture throughout the chicken. As the onions and lemon heat, they release their juices in the chicken, which in turn, steams the chicken from the inside and creates a moisture-laden chicken
There is nothing easier than cooking a whole chicken. Most people are afraid of cooking whole chickens because they take a long time to cook, and once it’s finished, taking it apart can be a challenge. However, the fun is putting the chicken on the table and watching your family rip it apart for their favourite pieces. No need to de-bone it properly, your family will get it ripped apart just fine.
Buying whole chickens can also save you tons of money.
Next time you’re at the store look at the price of a whole chicken and the price of two boneless/skinless chicken breasts. They will be a similar price, except with a whole chicken you get twice the amount of meat and you can use the bones for stock if you get ambitious.
Chicken gets a bad rap too with the whole salmonella poisoning possibility. As long as you wash your hands and surrounding counter/sink areas when you’re done playing with it, you’ll be fine.
Herbed Butter Whole Roasted Chicken
Ingredients:
• 1 Whole Chicken, 2 Tbsp Herbed Butter (See Other Recipe), 30 ml Olive Oil, Half an Onion, Half a Lemon, Salt and Pepper
Directions:
1. Preheat Oven to 375°F.
2. Rinse Chicken under cool water and pat dry.
3. Lift up skin from the breasts and add a tablespoon of the herbed butter onto the breasts, and under the skin.
4. Spread butter evenly over the breast, and lay skin back over the top of the breasts.
5. Cut the onion and lemon into quarters and place them in the chicken.
6. Rub the outside of the whole chicken with olive oil.
7. Season with Salt and Pepper.
8. Put in oven and cook for 1 hour or until the internal temperature reaches 165°F
9. Serve, Eat Well, and Be Happy
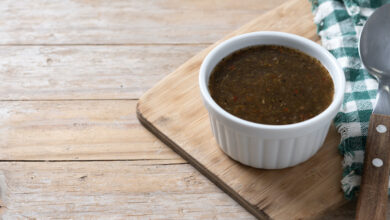
This simple recipe will have you using Herbed Butter in everything from finishing risottos, basting chickens, poultry stuffing, topping a steak, or finishing sauces. A nice chunk of this butter under the skin of a whole chicken will infuse your chicken with amazing flavours.
You can put any of your favourite herbs in place of these herbs. Anything you can think of such as Basil and Oregano, Lemon Thyme, Cinnamon Sugar, or Garlic and Chive. The possibilities are endless, and if you start having fun with your food, your mind and body will have fun too.
You can store in an airtight container in the fridge for up to three weeks or up to six months in the freezer. Wrap in saran wrap, mould into a log, and cut pieces off as you need. This way you don’t waste any and when you need it, simply cut a piece off the log and put it back in the freezer until next time.

Herb Butter
Ingredients:
• ¾ Cup Whole Sage Leaves
• 7 Stalks of Rosemary
• 60 ml Thyme
• 1 Cup Butter
• Salt and Pepper
Directions:
1. Remove herb leaves from stems.
2. Place herbs in a food processor and process until chopped.
3. Add butter and blend until incorporated.
4. Salt and Pepper to taste.
5. Serve, Eat Well, and Be Happy.
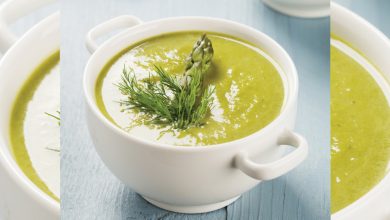
There is nothing more comforting than a sauce made of mostly cheese. We lighten things up for you and your family, by using cauliflower as a base rather than using milk, butter, or even cream for this sauce. Using a nice smoky bacon helps add a unique flavour to the dish and will bring everyone to the table when that sweet smell runs through the house. Bacon is optional if you are a vegetarian.
Your family will be singing your praises after they finish this amazing healthy-ish cheese sauce. In this recipe you can use whatever cheese you’d like, it is YOUR sauce after all. The most common cheeses are Cheddar, White Cheddar, Smoked Gouda, Swiss, Provolone, or Gorgonzola.
You will want to finish the sauce with a nice Parmesan or Pecorino Romano for great flavor.
Don’t be afraid of the gnocchi, it is even easier then noodles. Dump package of gnocchi’s into boiling water, when they float to the top cook for one to two minutes, and strain. That is IT!!
Bacon Gnocchi and Cheese
Ingredients:
• 1 Pound Bacon, 1 Package of Gnocchi, ¼ Head of Cauliflower, 1 Litre Vegetable Stock (or Chicken), 1 Onion, 3 Cups of Your Favorite Cheese – Shredded, Salt and Pepper
Directions:
1. Pre-heat broil to 550°F on your oven
2. Cut onion into small dices, reserve half for Bacon mixture and half for Cauliflower mixture
3. Cut bacon into chunks and cook to ¾ doneness, add Onions, and continue cooking until finished.
4. Set bacon and onions aside
5. Cut cauliflower into smaller pieces and place in a pot with the remaining onions and salt and pepper.
6. Add stock to cauliflower until covered with liquid, and boil.
7. When cauliflower is soft, blend in a blender.
8. Add cheese, and blend some more. Keep some cheese aside to top the dish.
9. Taste, Season, Taste.
10. Cook Gnocchi as directed on package.
11. When the gnocchi is finished cooking and strained, Add the bacon mixture to the Gnocchi, then add the cheese sauce.
12. Mix it all up and put it oven ready casserole dish, Top with leftover Cheese, and broil in the oven.
13. Serve, Eat Well, and Be Happy