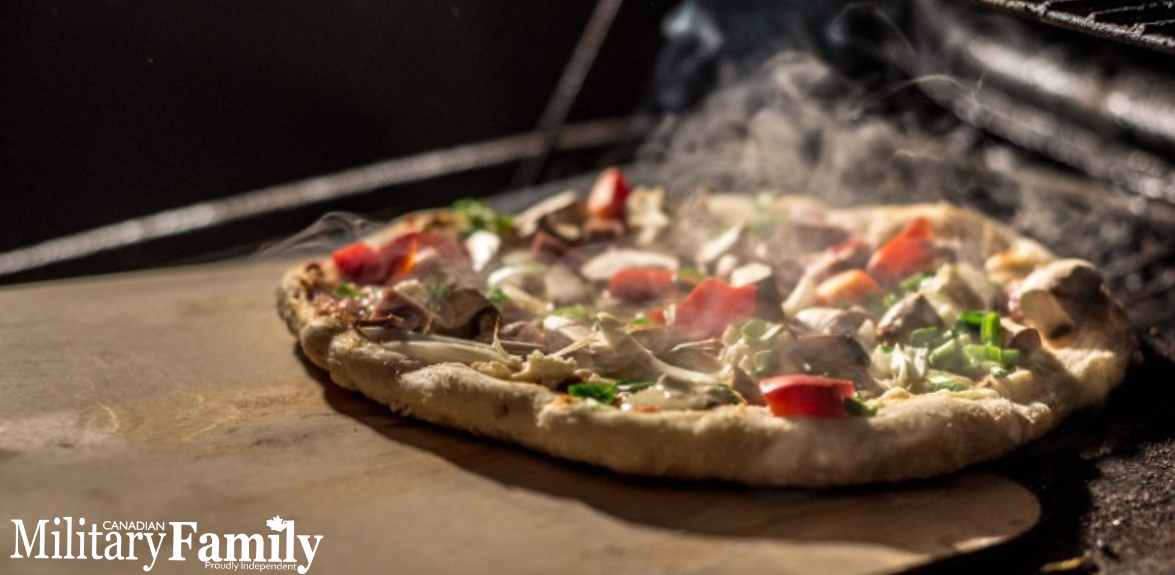
Let’s face it, the heat is on this summer. With the lazy hazy days of here why not make your own grilled pizza at home. This recipe includes home made pizza dough, tomato sauce and grilling instructions. Bon appetite!
PrintGrilled Pizza

Let’s face it, the heat is on this summer. With the lazy hazy days of here why not make your own grilled pizza at home. This recipe includes home made pizza dough, tomato sauce and grilling instructions.

When it comes to toppings, you can choose whatever you prefer to put on your pizza.
Here are a few suggestions:
- Olives: black | green
- mushrooms
- peppers: red | green | hot
- pineapple
- basil
- cheese: cheddar | motzza | goat | feta
- onions
- tomatoes
- pepperoni
- Prep Time: 2 hours
- Cook Time: 5 minutes
- Total Time: 2 hours 5 minutes
- Category: Dinner
Ingredients
Scale
- 1 ¼ cup flour
- 1 teaspoon yeast
- 1/8 cup olive oil
- ½ cup water
- 1 teaspoon salt
- see topping list above
Instructions
- Mix the water and yeast together in the bowl of a stand mixer or a large mixing bowl. Let stand for a few minutes until the yeast is dissolved. Stir the oil into the yeast mixture, then add the flour and salt.
- Knead the dough on low speed with a dough hook for 5 to 7 minutes, or knead by hand on the counter for 6 to 8 minutes. When kneaded, the dough should form a smooth ball, feel smooth to the touch, and spring slowly back when poked.
- Divide the dough into 2 lumps. Grease a baking pan lightly with olive oil or baking spray. Place the dough lumps in the pan and turn them over so they are coated with oil. Cover the pan with plastic wrap or a damp kitchen towel. Let rise in a warm place for 1- 1 ½ hours, until the dough has doubled in size.
- Cut up a wide variety of your favourite vegetables. Leave them large so they don’t slip through the grate. Toss them with oil and salt and pepper. Lightly grill the vegetables until they are tender. Reserve for topping the pizza.
- Take a good tomato paste and add a combination of the following: garlic powder, onion powder, oregano, basil and a little sugar to cut the acidity. Get creative and add chili flakes for some heat. You can also use a nice olive oil as a base and let your other ingredients shine!
- One the dough is ready shape the pizza dough by flattering it with your hands on a slightly floured surface. You can use your fingers to stretch the dough or you can hold the edges of the dough with your fingers. Once you have stretch the dough into a shape let is sit for 5 minutes and then push out the edges with your fingers until you have a nice round shape. Do not create a crust as it will interfere with grilling the dough.
- Heat grill. Once it is hot, wipe the grates with olive oil. Place the pizza dough round on lightly floured rimless cookie sheet. Over the grill, let the dough slide off the cookie sheet.
- Close the grill lid and let cook 2 mins. Open the lid and check the bottom of the dough to see if it is browning. If it is browning, but uneven, use tongs, large flipper, or spatula to rotate the dough 90 degrees for another minute. If the dough is browning evenly cover the grill and cook for another minute.
- It should only take a few minutes if you have a hot grill. However, this may cause the top of pizza dough to bubble
- Once browned, use the cookie sheet to remove it from the grill. Make sure to cover the grill, to retain the heat.
- Brush the grilled side of the pizza dough with a little extra olive oil, then cover with sauce. Be sure to not use to much, as you will end up with soggy dough.
- Top your pizza with your toppings.
- Slide your pizza back onto the grill. For gas grill reduce heat, for charcoal grill close the vents slightly on the cover.
- Close the lid and cook for 2-3 more minutes until the Botton begins to char and the cheese is bubbly.
- Remove pizza from grill with a spatula and put on cutting board or flat surface and let rest for a few minutes before cutting into slices.
- Slice and Serve.